A Guide to Roof Shingle Removal Techniques for DIY Homeowners
Roof shingle removal can seem like an overwhelming task for DIY homeowners. Whether you’re replacing damaged shingles or preparing for a roof overhaul, getting rid of the old ones is essential. In this guide, we’ll explore how to tackle the job safely, efficiently, and with minimal stress. Removing roof shingles on your own not only saves money but also gives you control over the process. However, it’s important to do it right to avoid unnecessary damage or accidents.
In this article, we’ll break down various roof shingle removal techniques, step-by-step, and offer practical tips to help you complete the job smoothly. If you’re someone who enjoys DIY projects or is simply looking to replace worn-out shingles, this guide is designed for you.
What Tools Do You Need for Roof Shingle Removal?
Before starting, it’s crucial to have the right tools on hand. Proper tools make the process smoother and reduce the risk of injury. Let’s go over the essential equipment needed for this task.
- Roofing shovel or tear-off tool
- Hammer or nail puller
- Utility knife
- Safety gear (gloves, goggles, and a sturdy ladder)
- Tarps for debris collection
- Nail magnet to pick up stray nails
Having the right gear will make the task more manageable and keep you safe. A roofing shovel or tear-off tool is designed to remove shingles quickly and efficiently, while safety gear like gloves and goggles will protect you from debris.
Helpful Hint:
Always use a sturdy ladder and make sure it’s positioned on level ground before starting your roof work. Safety should always be your top priority when removing roof shingles.
How to Prepare Your Roof for Shingle Removal
Before diving into shingle removal, it’s important to properly prepare your roof. Skipping this step could result in damage or make the job more difficult. Here’s how to get your roof ready for shingle removal.
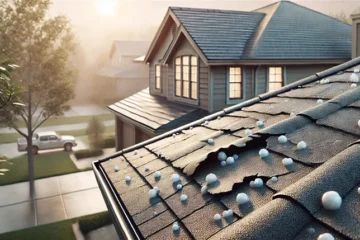
- Inspect your roof: Before starting, inspect the roof for any weak spots or areas that may need extra care during removal. Look for loose shingles, damaged sections, or soft areas.
- Clear the work area: Remove any objects or debris from the roof to ensure you have a clean, safe space to work.
- Cover plants and nearby areas: Use tarps to protect your landscaping and outdoor furniture from falling debris.
- Set up your tools: Place all your tools within reach, so you don’t have to make multiple trips up and down the ladder.
A well-prepared workspace reduces the chance of accidents and helps you work more efficiently. Taking the time to assess your roof and secure the area makes a big difference in the overall process.
Step-by-Step Roof Shingle Removal Process
Now that you’re prepared, it’s time to start the roof shingle removal process. Follow these steps to ensure a smooth and efficient job.
1. Remove Ridge Caps
Begin by removing the ridge caps, which are the shingles located at the top of the roof where the two sides meet. These are typically easier to remove compared to the other shingles and give you access to the rest of the roof.
2. Start at the Top and Work Your Way Down
Once the ridge caps are off, start removing the shingles from the top of the roof and work your way down. Use a roofing shovel or tear-off tool to lift the shingles and pry them loose. If you’re having trouble, use a hammer or pry bar to remove any stubborn nails.
3. Remove Nails and Underlayment
After the shingles are removed, you’ll need to take care of the nails and underlayment. The underlayment is the protective layer between the shingles and the roof decking. Carefully pull up the underlayment and discard it along with the shingles.
4. Collect and Dispose of Debris
As you remove the shingles, use tarps to collect the debris and keep your workspace clean. This makes the cleanup process easier once you’re done.
Helpful Hint:
Use a magnetic sweeper to pick up nails and other small debris around the work area. This ensures that you won’t leave any dangerous materials behind that could cause injury later.
Common Mistakes to Avoid When Removing Roof Shingles
Mistakes during roof shingle removal can lead to costly repairs or even injury. Here are some common mistakes and how to avoid them.
1. Not Using the Proper Safety Gear
One of the biggest mistakes is not wearing the right safety gear. Always use gloves, goggles, and sturdy shoes to protect yourself from sharp debris and ensure steady footing.
2. Skipping the Roof Inspection
Failing to inspect the roof before starting can lead to issues during removal. Weak spots or damaged areas can worsen if you don’t take precautions beforehand.
3. Not Disposing of Materials Properly
Improper disposal of shingles and nails can create hazards in your yard and driveway. Always use tarps and a debris chute, if possible, to control the mess and make cleanup easier.
Stats:
According to the National Roofing Contractors Association, improper roof work results in thousands of accidents each year. This highlights the importance of safety and preparedness when tackling a DIY roof project.
Common Mistakes to Avoid During Roof Shingle Removal
| Mistake | Why It’s a Problem |
|---|---|
| Not inspecting the roof beforehand | Failing to inspect your roof can lead to additional damage or missed weak spots that could pose safety risks. |
| Skipping safety gear | Not wearing protective gloves, goggles, or using a harness increases the risk of injury. |
| Improper debris disposal | Leaving nails and shingles scattered can be hazardous to others and cause damage to your property. |
| Working alone on the roof | Not having assistance can be dangerous, especially if something goes wrong or if you’re working on a high roof. |
How to Stay Safe While Removing Roof Shingles
Safety should be your top priority when removing roof shingles. Working at heights and handling heavy materials can present hazards, so it’s important to take every precaution. Here are some key safety tips to follow during the project.
1. Wear Proper Footwear
Wearing the right footwear is critical for maintaining grip and balance while on the roof. Choose shoes with rubber soles that provide good traction, especially if you’re working on a sloped surface.
2. Secure Your Ladder
A well-positioned and secure ladder is crucial for your safety. Make sure the ladder is placed on flat, stable ground, and always maintain three points of contact when climbing or descending.
3. Work in Pairs
Having someone with you during roof shingle removal is highly recommended. A partner can help manage tools, hold the ladder, and assist with any unexpected situations that arise.
Helpful Hint:
Consider investing in a roof harness or fall protection system, especially if your roof has a steep slope. This extra layer of protection can prevent serious injuries in case of an accidental slip or fall.
How to Clean Up After Roof Shingle Removal
The cleanup process is an essential part of removing roof shingles, but it’s often overlooked. A thorough cleanup ensures that your property is safe and ready for the next step, whether that’s installing new shingles or simply disposing of the old ones.
1. Collect All Debris
Using tarps makes it easy to collect the shingles as you remove them, but don’t forget about stray nails and smaller pieces of debris. Go over the worksite with a magnetic sweeper to collect any loose nails.
2. Properly Dispose of Shingles
Roof shingles are considered construction waste and need to be disposed of according to your local regulations. You may need to rent a dumpster or take the debris to a local disposal site. Some areas offer recycling programs for asphalt shingles.
3. Check for Leftover Damage
Once all the debris is cleared, take a moment to inspect the roof decking for any damage that may have occurred during removal. Fixing these issues now will save you time and effort down the line.
When Should You Call a Professional?
While many DIY homeowners can handle roof shingle removal, there are times when it’s better to call in a professional. Here are a few situations where expert help might be needed.
1. Structural Damage
If you notice any significant structural damage while inspecting your roof, it’s best to leave the job to a professional. Attempting to remove shingles from a compromised roof can be dangerous and lead to further issues.
2. Steep Roof Pitch
If your roof has a steep pitch, removing shingles on your own can be risky. A professional roofer will have the necessary equipment and experience to safely handle the job.
3. Limited Time or Experience
Roof shingle removal is a time-consuming process, and if you’re short on time or lack experience, hiring a professional may be the best option. This ensures the job is done quickly and correctly without the risk of mistakes.
Should You Remove Roof Shingles Yourself?
Pros
- Cost savings compared to hiring a professional roofer.
- Complete control over the timeline and process.
- Gains valuable DIY experience for future home projects.
Cons
- Potential for injury if safety precautions aren’t followed.
- Time-consuming, especially for larger roofs or complex structures.
- Risk of damaging the roof structure if done incorrectly.
FAQs
Wrapping Up
Roof shingle removal can be a rewarding DIY project for homeowners looking to save money and gain hands-on experience. By following the right techniques and prioritizing safety, you can tackle this task with confidence. We’ve covered everything from tools and preparation to safety precautions and common mistakes to avoid. Whether you’re preparing for a full roof replacement or just replacing a few shingles, removing old shingles properly is a crucial step. If you ever feel unsure or face challenges, don’t hesitate to call in a professional.
Remember, safety is key, and having the right tools and knowledge can make all the difference in the success of your project. Hopefully, this guide on roof shingle removal techniques for DIY homeowners has answered your questions and provided you with the confidence to get the job done.