Best Techniques for Removing Wallpaper Paste Residue

Removing wallpaper is one of those home improvement tasks that seems straightforward until you’re left with stubborn wallpaper paste residue clinging to your walls. Whether you’re preparing to repaint or apply new wallpaper, getting rid of this sticky mess is crucial for a smooth, professional finish. In this guide, we’ll walk you through the best techniques for removing wallpaper paste residue, ensuring your walls are clean, smooth, and ready for your next project.
Why Is It Important to Remove Wallpaper Paste Residue?
Many homeowners underestimate the importance of thoroughly removing wallpaper paste residue, but skipping this step can lead to several issues. Residue can interfere with paint adhesion, causing bubbles and an uneven finish. If you’re applying new wallpaper, the old paste can prevent it from sticking properly. Additionally, leftover residue can attract dust and dirt, leaving your walls looking dirty even after you’ve applied fresh paint or wallpaper. To avoid these problems, it’s essential to remove all traces of paste before moving forward with your project.
What Tools and Materials Do You Need?
Before diving into the removal process, gather the necessary tools and materials. Having everything on hand will make the job easier and more efficient.
- Scraper or putty knife
- Bucket of warm water
- White vinegar or wallpaper paste remover
- Sponges and cloths
- Protective gloves
- Drop cloths to protect floors
- Sandpaper or sanding block (optional)
How to Remove Wallpaper Paste Residue
Now that you’ve gathered your materials, let’s look at the step-by-step process for removing wallpaper paste residue. This process can be time-consuming, but with the right technique, you’ll achieve the best results.
Step 1: Soften the Paste
The first step in removing wallpaper paste residue is to soften it. You can do this by soaking the residue with a solution of warm water and vinegar. Mix one part vinegar with three parts warm water in a bucket. Using a sponge or cloth, apply the solution generously to the walls. Let it sit for 10-15 minutes to allow the paste to soften.
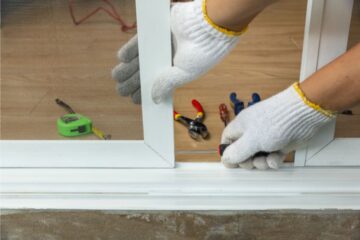
Step 2: Scrape Off the Residue
Once the paste has softened, use a scraper or putty knife to gently remove it from the wall. Be careful not to damage the wall surface, especially if you’re working with drywall. Scrape in a consistent direction, and wipe your scraper clean frequently to avoid spreading the paste.
Step 3: Wipe Down the Walls
After scraping off the bulk of the paste, wipe down the walls with a clean cloth soaked in the vinegar solution. This helps to remove any remaining residue and ensures the walls are thoroughly cleaned. If the paste is particularly stubborn, you might need to repeat the soaking and scraping process.
When Should You Use a Wallpaper Paste Remover?
In some cases, vinegar and water may not be strong enough to remove all the wallpaper paste residue. If you’re dealing with particularly stubborn residue, a commercial wallpaper paste remover might be necessary. These products are formulated to break down the paste quickly and can save you time and effort.
How to Use Wallpaper Paste Remover
Follow the manufacturer’s instructions for the specific wallpaper paste remover you’ve chosen. Generally, you’ll apply the remover to the walls with a sponge or cloth, let it sit for a few minutes, and then scrape off the residue. Be sure to work in a well-ventilated area and wear protective gloves to avoid skin irritation.
Should You Sand the Walls After Removing Wallpaper Paste?
After removing the paste, your walls might feel slightly rough or uneven. In such cases, a light sanding can help smooth out the surface. Use fine-grit sandpaper or a sanding block to gently sand the walls, focusing on any areas where the paste was particularly thick. Be careful not to sand too aggressively, especially on drywall, as this can damage the wall.
Helpful Hint:
If you plan to paint your walls after removing wallpaper paste, consider applying a primer before painting. This will help to seal any remaining residue and ensure an even finish.
How Long Does It Take to Remove Wallpaper Paste Residue?
The time it takes to remove wallpaper paste residue can vary depending on the size of the room and the condition of the walls. On average, it can take several hours to a full day to complete the process, especially if multiple applications of the vinegar solution or wallpaper paste remover are needed. Be prepared to invest the time required to do the job thoroughly, as rushing through it can lead to poor results.
How to Prevent Wallpaper Paste Residue in the Future
While you can’t entirely avoid dealing with wallpaper paste residue, you can take steps to minimize it in the future. If you plan to apply new wallpaper, choose a high-quality adhesive and follow the manufacturer’s instructions carefully. When it comes time to remove the wallpaper, doing so slowly and methodically can help reduce the amount of residue left behind.
Common Mistakes to Avoid When Removing Wallpaper Paste Residue
Even with the best intentions, it’s easy to make mistakes when removing wallpaper paste residue. Here are some common pitfalls to watch out for and how to avoid them:
Using Too Much Water
While soaking the paste is necessary, using too much water can cause problems, especially if you’re working with drywall. Excess water can seep into the drywall, causing it to swell and deteriorate. To avoid this, apply water sparingly and use a well-wrung-out sponge or cloth. If you notice any signs of damage, stop immediately and allow the wall to dry before continuing.
Scraping Too Aggressively
Scraping is an essential part of the removal process, but it’s important to do so gently. Aggressive scraping can damage the wall surface, leading to costly repairs. Use a light touch, and if the paste isn’t coming off easily, try soaking it again rather than forcing it with the scraper.
Not Removing All Residue
It can be tempting to stop once the majority of the paste is gone, but leaving even a small amount of residue can cause problems later on. Ensure that all traces of paste are removed by wiping down the walls multiple times and inspecting them carefully. A smooth, clean surface is essential for the best results in your next project.
Comparison of Wallpaper Paste Removal Methods
| Method | Time Required | Best For | Potential Drawbacks |
|---|---|---|---|
| Vinegar and Water | Moderate | Eco-conscious homeowners | May require multiple applications |
| Commercial Paste Remover | Fast | Large areas, stubborn residue | Contains harsh chemicals, higher cost |
| Steamer | Fast | Wallpaper with tough adhesive | Risk of water damage on drywall |
| Scraping and Sanding | Slow | Small areas, detailed work | Physically demanding, risk of wall damage |
Should You Consider Professional Help?
Removing wallpaper paste residue can be a time-consuming and physically demanding task. While it’s certainly possible to do it yourself, there are situations where professional help might be worth considering. If you’re dealing with a large area, thick layers of residue, or you simply don’t have the time or energy, hiring a professional can save you a lot of hassle.
Benefits of Hiring a Professional
- Professionals have the right tools and expertise to get the job done quickly and efficiently.
- They can handle difficult situations, such as removing residue from textured walls or hard-to-reach areas.
- Hiring a professional can free up your time for other important tasks or projects.
What to Do After Removing Wallpaper Paste Residue
Once you’ve successfully removed the wallpaper paste residue, the next steps depend on what you plan to do with your walls. Here’s a quick guide on how to prepare your walls for different finishes:
Preparing Walls for Paint
If you’re planning to paint, make sure the walls are completely dry before proceeding. Apply a primer to seal the surface and ensure an even finish. A primer will also help to cover any imperfections left behind from the paste removal process.
Preparing Walls for New Wallpaper
If you’re reapplying wallpaper, it’s essential to ensure the walls are smooth and free of any remaining residue. Sand the walls lightly if needed, and apply a wallpaper primer to create a strong bond between the wall and the new wallpaper.
Environmental Considerations When Removing Wallpaper Paste Residue
As more homeowners become conscious of their environmental impact, it’s important to consider eco-friendly methods for removing wallpaper paste residue. Here are some tips to keep your removal process as green as possible:
Use Natural Cleaning Solutions
Instead of harsh chemicals, opt for natural solutions like vinegar and water. These are not only effective but also non-toxic and biodegradable. If you choose to use a commercial wallpaper paste remover, look for products that are environmentally friendly and free from harmful chemicals.
Dispose of Waste Responsibly
When you’re finished, dispose of any waste materials responsibly. Avoid pouring leftover cleaning solutions down the drain, as they can harm the environment. Instead, follow local guidelines for disposing of chemicals and cleaning materials.
Stats:
According to a study by the American Society of Interior Designers, 85% of homeowners who thoroughly removed wallpaper paste residue before repainting reported fewer issues with paint adhesion and finish quality.
Helpful Hint:
After removing wallpaper paste, run your hand over the wall to check for any remaining sticky spots. If you find any, reapply your cleaning solution and wipe it down again to ensure the surface is completely clean.
Advantages and Disadvantages of Wallpaper Paste Removal Methods
Pros
- Using natural solutions like vinegar is eco-friendly and non-toxic.
- Soaking and scraping methods are cost-effective and require minimal tools.
- Commercial paste removers are fast-acting and can save time on large projects.
- Sanding after removal ensures a smooth surface for painting or new wallpaper.
Cons
- Soaking walls can cause water damage, especially on drywall.
- Scraping can be physically demanding and time-consuming.
- Commercial paste removers can be expensive and contain harsh chemicals.
- Over-sanding can damage walls, especially if not done carefully.
FAQs
Wrapping Up
Removing wallpaper paste residue is a crucial step in ensuring your walls are ready for a fresh coat of paint or new wallpaper. By taking the time to thoroughly clean your walls, you’ll avoid common issues like poor paint adhesion and uneven finishes. Whether you choose natural methods or commercial removers, the key is to be patient and thorough. Remember, a smooth, clean surface is the foundation for any successful home improvement project. With the right techniques and a bit of effort, your walls will be ready for their next transformation in no time.