Exterior Paint Preparation

The right preparation will set the stage for a successful exterior paint job.
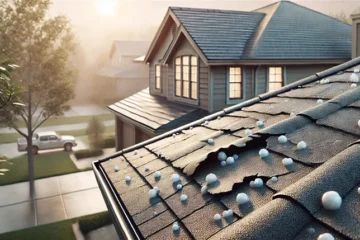
How to Identify Lead Paint and Remove It
The proper preparation will pave the way for a successful exterior painting project.
- Sand it off
- Remove the paint and varnish with a paint and varnish remover.
- Use a heat gun
If your home was constructed between 1940 and 1978, however, there’s a 50/50 risk that the paint contains lead. And, if it was built before 1940, the paint is almost certainly lead-based. If you suspect your home’s exterior has lead, submit paint chip samples to a laboratory to confirm your suspicions (this approach yields the most reliable results). Reputable labs can be recommended by your state’s health department. Check for lead with a do-it-yourself kit, which may be found at home centers, paint stores, and online.
If you discover lead in your paint, proceed with caution because local and state regulations can be strict. In Rhode Island, for example, do-it-yourselfers must adhere to the same standards as qualified lead-abatement contractors. These are some of the practices:
- Notifying neighbors about the work’s completion date and the procedures to be employed
- Covering the ground beneath any work sites with impenetrable plastic sheeting
- Ascertain that any power sanding tools are connected to a HEPA (high-efficiency particulate air) vacuum system that captures all dust.
- Wet scraping, rather than dry scraping, produces no dust.
- Paint strippers and heat guns are not to be used.
- At the end of each day, collecting and storing all rubbish in certified plastic bags.
These regulations have been put in place to ensure the safety of others. There is also a list of equipment that you must wear for your personal safety, as well as a necessity for frequent blood tests to monitor for lead exposure. Make sure you’re up to date on all applicable regulations by checking with your local building department.
How to Pressure Wash
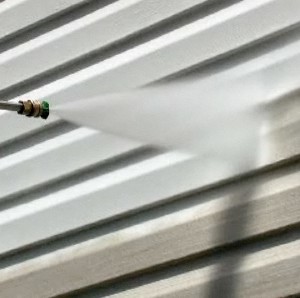
The first step in any painting project is to clean the surface because dust, dirt, oil, and grime all weaken the binding between the paint and the surface. Cleaning siding with a pressure washer (power washer) is the most convenient method. This is a common rental item that costs $50–60 per day. All you need is a unit with a pressure rating of 1,300 to 1,600 psi (pounds per square inch). A machine with a greater pressure rating makes the job no easier and may even damage the surface.
1. Cover any surrounding plants with plastic sheeting first. Apply the same principle to the surfaces of your driveway, patio, and walkway.
2. Use a dilute bleach solution to clean mildewed spots (1 part bleach to 10 parts water). After that, completely rinse away the bleach solution.
3. Fill the cleaning reservoir with a detergent solution if your pressure washer has one. Place the machine’s siphon hose into a detergent container if it isn’t already.
4. Clean the siding from bottom to top, then rinse the siding from top to bottom. Move the spray’s tip away from the siding if it begins to gouge it.
Paint Preparation
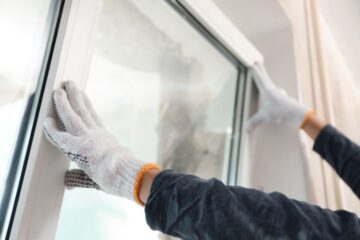
After pressure-washing a surface, scrape and sand away any loose paint to ensure that the fresh paint adheres effectively and lasts a long time. You do, however, have an option about how much scraping you want to perform at some point. You have two options:
- Remove all loose paint and smooth the borders of the undamaged paint: this will provide a solid foundation for the new paint.
- Remove all of the old paint: This will result in a smooth, completely new coat when you’re finished, but it’ll take a lot more time.
If you’re completing the job yourself, the first option may be preferable. If you want a perfectly completed surface, you should probably employ a professional to handle the job.
1. Use plastic or canvas drop cloths to cover plants and shrubs. Include any significant external devices, such as air conditioners and heat pumps, in your plan (turn them off first).
2. If you want to sand off all of the old paint, rent a siding grinder. This tool is functional, however it is difficult to operate and generates a lot of dust. Another method for entirely removing paint is to use a heat gun, which softens the paint and allows you to scrape it away. A paint scraper is required to remove only the loose paint. The blades on this tool are interchangeable, and it works best on the pull stroke.
3. Sand the edges of the sound paint with an 80- or 100-grit sandpaper using a random orbit sander or a finishing sander.
4. Use caulk or wood filler to cover any holes or cracks (see “How to Caulk”). Smooth the surface with a putty knife after applying either one.
5. Use 80- or 100-grit sandpaper to sand glossy paint areas on window trim or doors to improve the bonding surface for the new paint.
6. Use a flap sander placed on an electric drill to remove paint from big curved surfaces like crown moulding.
How to Caulk
Caulking the cracks and holes in your siding and trim is an important step in the painting process. You’ll be able to check the entire structure for air and water leaks while painting every square inch of it, and you’ll be able to correct any problems you detect. If you think caulking is a pain, remember that no other energy-saving effort comes close to generating the same savings per dollar invested.
Silicone caulk is the ideal substance for outdoor caulking jobs. It comes in white and clear formulations and costs between $4 and $5 each tube.
1. Use a utility knife to cut free and scrape off broken caulk from the joints between siding and trim boards.
2. Prime any bare wood fibers exposed by the removal of the caulk. With a trim brush, work the primer into the joint.
3. Fill the joint with silicone caulk after the primer application has dried. If the bead is bumpy, use a damp finger to smooth it out.
4. Cover the joint with paint once the caulk has glazed over and the surface is dry to the touch (approximately 30 minutes).