How to Paint Windows, Doors, Walls and Ceilings

Even if you paint your ceilings and walls the same color, it’s best to choose a higher gloss for trim, windows, and doors. Semi-gloss or gloss paint is more durable than flat paint and much easier to wash. When painting these areas, remember to:
- Apply primer: Prime any bare wood and surfaces with wood-filler repairs.
- Start with the windows: Paint the sashes first, then finish up with the casing boards.
- Remove doors before painting them: For best results, remove each door from its hinges and lay it flat on sawhorses. Start with the flat panels, followed by the horizontal rails and vertical stiles. Also, paint the top and bottom of the door. Complete each door by painting the door jambs and casing boards.
- Paint trim from top to bottom: Paint the trim starting at the top of the room and move down to the baseboard.
- Sand and repaint uneven surfaces: If the surface of any window, door, or trim piece feels rough after the paint is dry, sand it lightly using 220-grit sandpaper. Then wipe away the dust and apply another coat of paint.
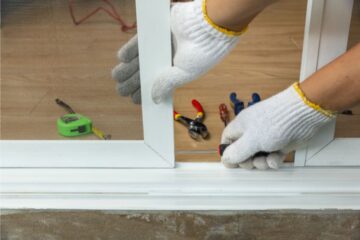
1. Apply painter’s tape as needed. Using a sash brush, paint the window next to the glass. Overlap the paint slightly onto the glass to create a weatherproof seal.
2. Finish each sash using smooth, steady brush strokes. As the paint dries, move each sash up and down to prevent sticking.
3. Next, paint the window jambs, casing boards, sill, and apron (in this order). When the paint is dry, remove any painter’s tape.
4. Paint the door panels first, followed by the rails and stiles. Let the first side dry before turning the door over.
5. Start painting the trim at the top of the wall. Use a circular brush motion to work paint into any ornate moldings.
6. Finish the trim by coating the baseboards. Use a wide drywall knife as a shield to protect the floor from accidental paint spills.
Walls and ceilings are probably the easiest and fastest surfaces to paint. Each full roller covers 8–10 square feet of surface area and takes just a few minutes to apply. To get the best results:
- Paint the ceiling first: Use an extension handle on your roller to reach the ceiling. If you are working on a ladder, make sure your paint tray is attached securely to the ladder’s utility shelf.
- Wear goggles: When you’re using a roller, especially overhead, it’s important to protect your eyes from wayward paint drops.
- Work slowly: The faster you move the roller, the more paint splatters off the cover.
- Work during the day: Natural light is the best light, so take advantage of it. If you have to work at night, use four lamps—one at each corner of the room.
- Work in small sections: This reduces the possibility of visible roller marks by letting a surface dry before it is completely painted.
- Clean the roller: After use, remove the paint from the roller with a combination tool. Store the roller in a sealed plastic bag.
1. Outline the walls and the ceiling with a brush. Apply the paint, cut in the ceiling line, and brush the paint smooth.
2. To paint the ceiling, work in areas about 4′ on a side. Begin with a diagonal stroke followed by back-and-forth strokes.
3. To roll the walls, start in one corner and smooth out the brushed areas with a relatively dry roller pulled straight down.
4. Use the roller to smooth the brushed paint along the ceiling too. Make sure to stay about 1/2″ away from the ceiling.
5. Work in small areas that are about 2′ × 4′. Start with a diagonal stroke, followed by vertical and horizontal strokes.
6. When you’re done for the day, clean the roller partially and store the roller cover in a sealed plastic bag for the next day.