Protecting Hardwood Floors: Tips for Effective Sealing

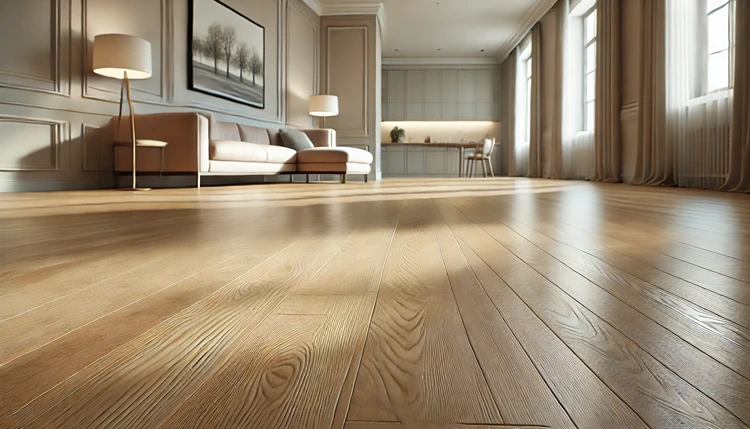
Hardwood floors are a timeless choice for adding beauty and value to any home, but they also require proper maintenance to ensure they last for decades. One of the most critical steps in protecting your hardwood floors is sealing them effectively. A well-sealed floor is more resistant to moisture, scratches, and everyday wear, keeping it looking fresh and polished. If you’ve ever wondered how to protect your hardwood floors with the right sealing techniques, you’re in the right place. This guide will walk you through everything you need to know to preserve your floors’ natural beauty.
Why Is Sealing Hardwood Floors Important?
Sealing hardwood floors is essential for several reasons. Most importantly, it protects the wood from water damage, which can lead to warping, staining, or mold growth. Additionally, it helps to shield the wood from scratches, scuffs, and dents caused by everyday foot traffic and furniture movement. Without a proper seal, your hardwood floors are more vulnerable to dirt and grime that can get embedded in the wood, making it harder to clean and maintain.
Helpful Hint:
Always test a small, hidden section of your hardwood floor before applying any new sealant. This way, you can ensure the product works well with your wood type and finish.
How Often Should You Seal Hardwood Floors?
The frequency of sealing hardwood floors depends on the type of wood, the finish applied, and how much traffic the area receives. On average, hardwood floors should be resealed every 3 to 5 years. However, high-traffic areas may need more frequent attention. If you notice the finish wearing away or areas that are becoming dull or scratched, it’s probably time for a new coat of sealant.
Signs It’s Time to Reseal Your Hardwood Floors
- Noticeable dull spots where the finish has worn away.
- Increased appearance of scratches or scuffs.
- Water isn’t beading on the surface but is instead soaking into the wood.
- The floor has lost its sheen and appears faded in certain areas.
If you observe any of these signs, it’s a good indication that your floors need resealing to protect them from further damage.
What Types of Seals Are Available for Hardwood Floors?
Choosing the right type of sealant for your hardwood floors can make a huge difference in their longevity and appearance. There are several types of sealants available, each with its benefits and drawbacks. Understanding these options will help you select the best one for your specific needs.
Oil-Based Polyurethane
Oil-based polyurethane is one of the most common sealants used on hardwood floors due to its durability and glossy finish. It creates a hard protective layer that can withstand heavy foot traffic. However, it does take longer to dry than other sealants, and it has a strong odor during application.
Water-Based Polyurethane
Water-based polyurethane is a great choice if you’re looking for a low-odor option with faster drying times. It provides a clear finish that won’t yellow over time, making it ideal for lighter wood floors. While it’s not quite as durable as oil-based polyurethane, it’s still a solid choice for most homeowners.
Penetrating Oil Seals
Penetrating oil seals are less common but are loved by those who want to maintain the natural look and feel of their hardwood floors. These sealants soak into the wood, providing protection from the inside out. They’re easy to apply and maintain but don’t offer the same level of surface protection as polyurethane-based seals.
Wax Finishes
Wax finishes offer a classic look and can enhance the beauty of older, more traditional hardwood floors. While wax is relatively easy to apply, it requires frequent reapplication and can be more susceptible to wear. Wax finishes are not water-resistant, so they’re not recommended for areas prone to spills or moisture.
Comparison of Hardwood Floor Sealants
| Type of Sealant | Drying Time | Durability | Finish |
|---|---|---|---|
| Oil-Based Polyurethane | 24 hours | High | Glossy, warm tone |
| Water-Based Polyurethane | 4-6 hours | Moderate | Clear, retains wood’s natural color |
| Penetrating Oil | 12-24 hours | Moderate | Matte, natural look |
| Wax Finish | 1-2 hours | Low | Matte, requires frequent maintenance |
How to Prepare Your Hardwood Floors for Sealing
Before applying any sealant to your hardwood floors, it’s crucial to prepare the surface properly. A poorly prepared surface can lead to an uneven finish and reduce the effectiveness of the seal.
Step 1: Clean Thoroughly
Start by cleaning your floors thoroughly to remove any dirt, dust, or grime. Use a vacuum to pick up loose debris, followed by a damp mop to clean the surface. Be sure to use a cleaning solution designed for hardwood floors to avoid damaging the wood.
Step 2: Sand the Floor (If Necessary)
If your floors are particularly worn or if you’re resealing after a long period, sanding might be necessary to remove the old finish and create a smooth surface for the new sealant. Always use fine-grit sandpaper to avoid damaging the wood.
Step 3: Remove Dust
After sanding, it’s essential to remove all dust particles before applying the sealant. Dust can get trapped under the seal, leaving your floors with a rough or cloudy finish. Use a vacuum and a tack cloth to ensure the surface is completely clean.
Helpful Hint:
When cleaning or sanding, always go with the grain of the wood to avoid scratches or damage that might show through once the sealant is applied.
How to Apply Sealant to Hardwood Floors
Applying sealant to hardwood floors is a delicate process that requires patience and precision. A poorly applied seal can lead to streaks, bubbles, or uneven protection. Follow these steps for the best results.
Step 1: Apply the First Coat
Using a high-quality applicator pad or brush, apply the first coat of sealant evenly across the floor. Be sure to work in sections, starting from one corner of the room and working your way out. Apply the sealant with long, smooth strokes in the direction of the wood grain.
Step 2: Allow to Dry
Once the first coat is applied, allow it to dry completely. Drying times will vary depending on the type of sealant used, but most sealants require at least 24 hours. Ensure the room is well-ventilated to speed up the process.
Step 3: Sand Between Coats
After the first coat has dried, lightly sand the surface with fine-grit sandpaper to remove any imperfections. This step helps the second coat adhere better and creates a smoother finish.
Step 4: Apply Additional Coats
Depending on the type of sealant and the level of protection you want, you may need to apply multiple coats. Most hardwood floors benefit from two or three coats of sealant. Be sure to follow the manufacturer’s instructions regarding drying times between coats.
Helpful Hint:
Use a light hand when sanding between coats to avoid removing too much of the previous layer. Your goal is to create a smooth, even surface for the next coat.
How to Maintain Sealed Hardwood Floors
Once your hardwood floors are properly sealed, the next step is maintaining them to keep their beauty intact for years to come. Even the most durable sealants need care and attention to remain effective. By following some simple maintenance practices, you can extend the life of your seal and protect your floors from unnecessary wear and tear.
Regular Cleaning
One of the easiest ways to maintain your sealed hardwood floors is by keeping them clean. Dust, dirt, and debris can act like sandpaper on your floors, causing scratches and dulling the finish over time. A regular cleaning routine will help prevent this damage.
Use a soft-bristle broom or vacuum cleaner with a hardwood floor attachment to remove dirt daily. Follow up with a microfiber mop and a cleaning solution designed specifically for hardwood floors. Avoid using water or steam, as excessive moisture can seep through the sealant and damage the wood beneath.
Preventing Scratches and Scuffs
Scratches and scuffs are some of the most common issues homeowners face with hardwood floors, especially in high-traffic areas. Here are a few simple ways to reduce the chances of damaging your floors:
- Place doormats at entryways to catch dirt and debris before it gets tracked inside.
- Use felt pads under the legs of furniture to prevent them from scratching the floor when moved.
- Trim your pet’s nails regularly to avoid scratches from claws.
- Consider area rugs in high-traffic zones, such as hallways or living rooms, to protect the floor underneath.
Avoid Harsh Cleaning Products
Many household cleaning products contain harsh chemicals that can strip the protective sealant from your hardwood floors. When cleaning, always opt for products labeled as safe for hardwood surfaces. Never use ammonia, bleach, or vinegar, as these can damage the finish.
Stats:
According to a survey conducted by the National Wood Flooring Association, 75% of homeowners reported that using the wrong cleaning products led to damage on their hardwood floors, with stripping of the sealant being the most common issue.
What Happens if You Don’t Seal Hardwood Floors Properly?
Failing to seal your hardwood floors properly or neglecting resealing when necessary can lead to significant damage. Without a protective seal, wood is highly vulnerable to moisture, which can cause it to warp or buckle over time. Furthermore, unsealed wood can absorb stains and dirt more easily, making it nearly impossible to clean.
Long-Term Damage
Over time, a poorly sealed hardwood floor can develop permanent stains from spills or tracked-in dirt. You may also notice splintering or cracking if the wood dries out due to insufficient protection. These issues can be costly to fix, as they often require sanding down the entire surface or even replacing sections of the floor.
Increased Maintenance
Unsealed or improperly sealed hardwood floors require much more maintenance than properly sealed ones. Without a protective layer, cleaning becomes a more frequent and difficult task, as dirt and spills penetrate the wood. Additionally, refinishing unsealed floors is more time-consuming and expensive, as it may involve repairing deeper damage caused by water or wear.
How to Choose the Right Sealant for Your Hardwood Floors
When selecting a sealant for your hardwood floors, there are a few key factors to consider. Choosing the right sealant will depend on your lifestyle, the type of wood, and the look you’re hoping to achieve. Here’s a closer look at some of the considerations that should guide your choice:
Consider Your Lifestyle
Do you have children or pets? Is your home subject to high traffic? If so, you’ll want to choose a more durable sealant, like oil-based polyurethane, which can stand up to heavy use. On the other hand, if you’re looking for a more natural finish and don’t mind regular maintenance, a penetrating oil sealant could be the right fit.
Wood Type Matters
The type of wood your floors are made of also plays a role in selecting a sealant. For example, softer woods like pine may benefit from a more durable, protective seal like polyurethane, while harder woods like oak may do well with a more natural oil finish that enhances their grain pattern.
Desired Aesthetic
Sealants can dramatically change the appearance of your hardwood floors, so it’s essential to consider the final look you’re hoping to achieve. For example, oil-based polyurethane adds a warm, amber tone to the wood, while water-based polyurethane keeps the wood’s natural color intact. Penetrating oil finishes often provide a matte look, perfect for those seeking a more rustic or vintage aesthetic.
How to Extend the Life of Your Sealed Hardwood Floors
While sealing is essential for protecting hardwood floors, there are additional steps you can take to extend the life of your floors and keep them looking beautiful. Here are a few practical tips:
Use Furniture Pads
As mentioned earlier, placing furniture pads under the legs of chairs, tables, and other heavy furniture can prevent scratches and dents. Be sure to check and replace these pads regularly, as they can wear down over time.
Minimize Sun Exposure
Direct sunlight can cause hardwood floors to fade or discolor over time. To prevent this, use curtains, blinds, or UV-blocking window films to reduce sun exposure in rooms with large windows. Additionally, rotating area rugs and furniture periodically can help distribute the effects of sunlight more evenly.
Maintain Humidity Levels
Wood floors can expand and contract with changes in humidity, which can lead to gaps, warping, or cupping. To avoid this, keep your home’s humidity levels consistent, ideally between 35% and 55%. Using a humidifier in the winter and a dehumidifier in the summer can help maintain these levels.
Stats:
Research by the National Wood Flooring Association indicates that 80% of hardwood floor damage is caused by fluctuations in humidity levels. Maintaining stable indoor humidity can prevent up to 50% of common flooring issues.
Advantages and Disadvantages of Sealing Hardwood Floors
Pros
- Provides long-lasting protection from moisture and spills.
- Prevents scratches, scuffs, and everyday wear and tear.
- Enhances the natural beauty of the wood, adding shine and depth.
- Makes cleaning and maintenance much easier.
- Increases the durability and lifespan of your hardwood floors.
Cons
- Some sealants require multiple coats, which can be time-consuming.
- Sealing may not be DIY-friendly for inexperienced homeowners.
- Oil-based sealants have strong odors and longer drying times.
- Regular resealing is required to maintain protection.
- Penetrating oil finishes may not provide the same level of surface protection as polyurethane-based seals.
FAQs
Wrapping Up
Sealing hardwood floors is one of the best ways to protect your investment and ensure their beauty lasts for years. Whether you choose oil-based polyurethane, water-based polyurethane, or penetrating oil, properly sealing and maintaining your floors will shield them from water damage, scratches, and everyday wear and tear. By following the steps outlined in this guide and resealing your floors when needed, you can keep them looking fresh and vibrant. Remember to clean your floors regularly, avoid harsh chemicals, and address any signs of wear promptly. With a little care and attention, your hardwood floors will continue to shine and enhance your home’s aesthetic for decades to come.


